UI Overview
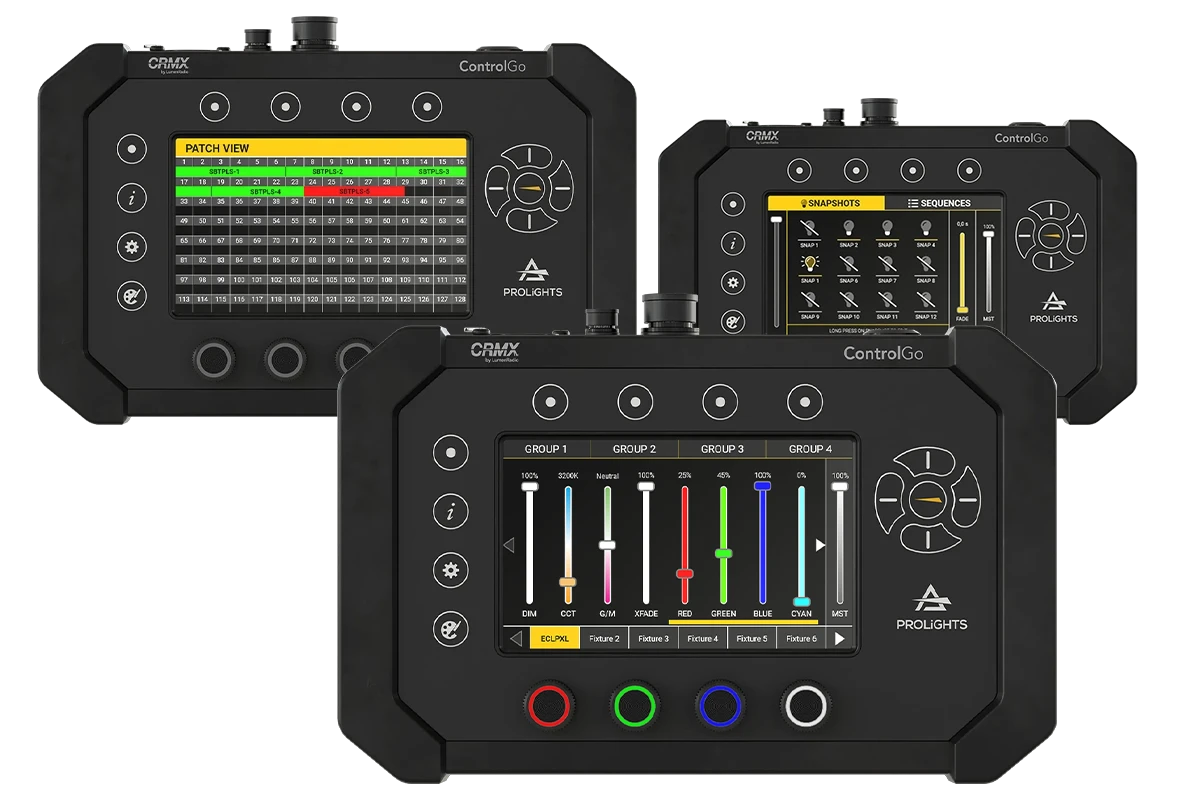
The ControlGo device has a user-friendly interface that makes it easy to control and navigate its functions. It features a touchscreen and several buttons, each with its own specific use. Here’s a breakdown of the main buttons and where they are located:

Group Buttons: These buttons are located above the display. They let you select and manage up to four groups of lights. The button on the far left also works as the Back/Esc button to go back to the previous menu.
Info Button: This button is on the left side and opens the DMX output view. It provides more information about what’s currently happening with your lights.
Show Tools Button: This button is on the left side of the display. It provides quick access to snapshots, sequences, and other commonly used lighting presets. This makes it easier to set up or adjust scenes during live events.
Enter Button: This button is on the right side. It lets you confirm your selections or enter different modes.
Arrow Buttons: These are positioned on the right side and make it easy to navigate through the menus.
Gear Button: This button is on the left side and is used for accessing settings and configuration options.
Each of these buttons can have different functions depending on which screen or mode you’re in, making it easy to adapt ControlGo to what you need at the time.
Home Screen
The home screen on the ControlGo device gives you quick access to all the main functions through the touchscreen. Here’s what you can find on the home screen:
At the bottom left of the screen, you’ll see the current date and time. In the middle bottom, there is the CRMX connection status, and at the bottom right, you can find the installed firmware version.
This home screen layout makes it easy to move between different functions and gives lighting technicians everything they need to manage their setups quickly and effectively.